Washing machines are not self-cleaning but taking care of them is quick and easy. Follow these steps to keep your clothes coming out fresh and clean!
Many people aren’t aware that regular cleaning of a washing machine is necessary to keep it running efficiently. “It’s a washing machine; it cleans itself, right?” Unfortunately, this is not the case! Your washing machine constantly deals with bits of food, clothing fibers, hair, forgotten tissues and chapstick, and whatever else is stuck to (or left in) your clothes.
On top of that, your washing machine’s warm, wet world is an ideal environment for mold and mildew to grow. Add in detergent and hard water buildup in hard-to-reach areas well; you’re starting to see the picture.
Cleaning your washing machine is not difficult or time-consuming. All it takes is a few common household materials, and if you do this regularly, it will get easier every time.
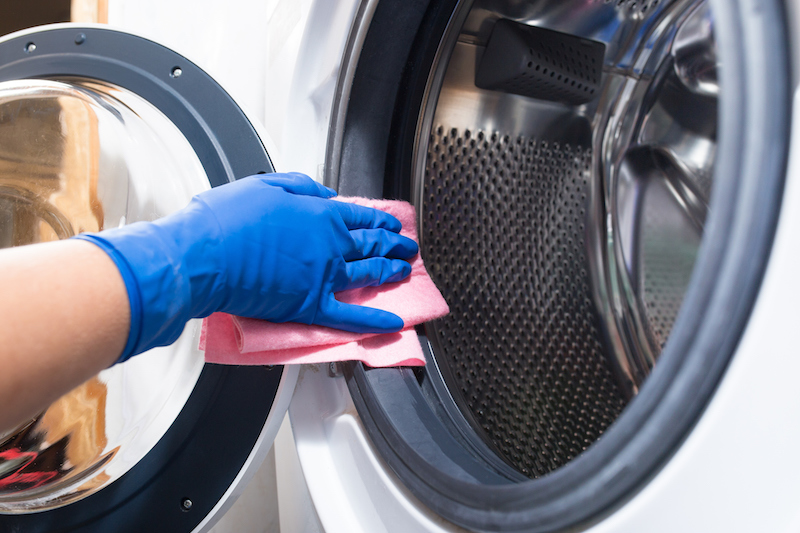
Cleaning a Front Loader
 Materials:
Baking Soda
White Vinegar
Rag
Toothbrush
Step 1:
The first step is to clean all the areas you can reach with a rag or toothbrush dipped in vinegar. This includes the door, the window, the seal, the inside of the drum, and all the nooks and crannies you can get to. Make sure that you use a soft fabric not to scratch the enamel or glass. For filthy areas, create a paste with the baking soda by mixing it with the vinegar in a small dish, or sprinkle it where needed. This will act as a mild abrasive and help remove stuck-on grime. The paste is handy when using the toothbrush to clean the rubber seal around the glass.
Step 2:
Fill the liquid detergent dispenser with 1 – 2 cups of vinegar. This will break down any hard water and detergent buildup while simultaneously disinfecting your machine. Set your device on the sanitize cycle (or the hottest cycle on your machine), the full-load setting, and run it empty.
Step 3:
When that cycle is finished, add 1/3 cup of baking soda to the drum. Just pour it right in and then run the machine on hot again. This will prevent any lingering odors and help break down any residual grime that the vinegar didn’t wash away.
You do not add the vinegar and baking soda in the same cycle because vinegar is an acid and baking soda a base, and they will neutralize each other. So it won’t damage your machine, but it will reduce the cleaning benefits that each provides.
Once these steps are clean, your machine is good to go. I recommend running this cleaning process once a month to ensure that your clothes are left smelling clean and fresh.
 Cleaning a Top Loader
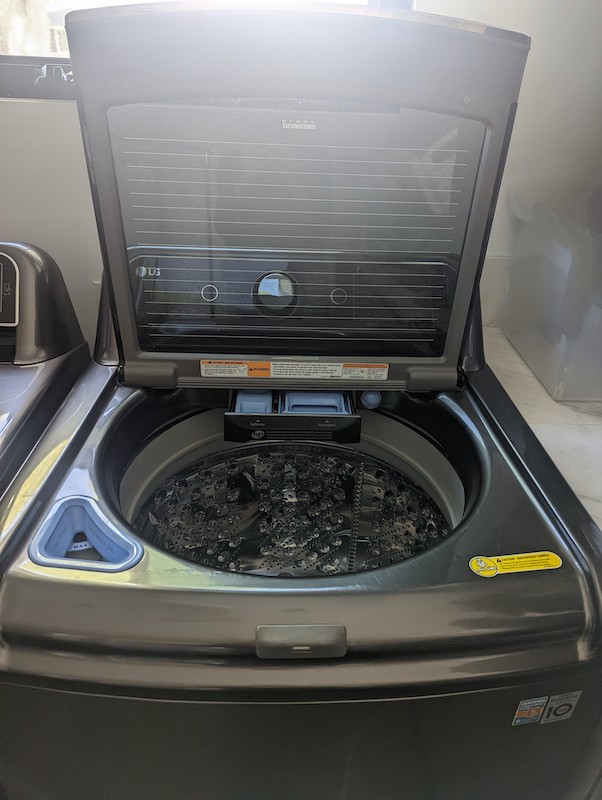
Cleaning a top loader is quicker than cleaning a front loader because the door is more out of the way. Also, because water is not sloshing against it while running a clothes cycle, it is less likely to accumulate the mold and grime that a front loader does. Other than that, the process is very similar.
Materials:
Baking Soda
White Vinegar
Rag
Toothbrush
Step 1:
When cleaning a top loader, the first step is to fill your machine with hot water. To do this:
Start a cycle and then interrupt it halfway through.
Add 3 cups of vinegar to the basin and stir to mix it with the water.
Let this mixture sit for one hour to give it time to break down any grime that is in the basin.
Step 2:
While you are waiting, dip your rag and toothbrush into the water and use this to clean the area around the door. If you need extra scrubbing power, you can create a paste with the baking soda or sprinkle it around. Make sure to keep the baking soda from spilling over into the drum, as the chemical properties of baking soda and vinegar will cancel out their cleaning ability.
You can also use a spray bottle filled with vinegar. This helps reach gaskets deep into the detergent and bleach dispensers and the machine’s exterior. If your machine has any removable parts, you can soak these in the vinegar bath while you clean the outside.
Step 3:
Run a complete cycle when the exterior has been cleaned, and the mixture has soaked for an hour. This will thoroughly clean the areas of the machine that you can’t get to and rinse away the vinegar. Once finished, leave the door open for the inside to dry out.
Steps For a Very Dirty Washing Machine
Sometimes, vinegar and baking soda won’t be strong enough to get your machine as clean as you want it. This might be the case if you hadn’t washed your device before or moved into a new home and want to start fresh.
Step 1:
If this is the case, fill your washer with hot water and add a quart of bleach. Next, start the machine and let it run for one minute to mix things up, then open the top and let it soak for one hour.
After it has soaked, close the lid and run your machine on a complete cycle. The device will drain the bleach and rinse any residue left behind. Once finished, you will repeat this cycle but with vinegar.
Step 2:
Fill your washer with hot water and add a quart of white vinegar to the water and into the bleach compartment. Let the machine run for a minute to agitate the mixture and then lift the lid and let it sit for an hour. When the hour is up, run a complete cycle, and your machine will be fresh and clean!
Tips:
When not using your washing machine, always leave the door open to dry out thoroughly. This will go a long way in preventing mildew and mold buildup and keep things smelling fresh.
Never leave wet clothes in the washer! Instead, transfer them immediately into the dryer or hang them on a drying rack.


